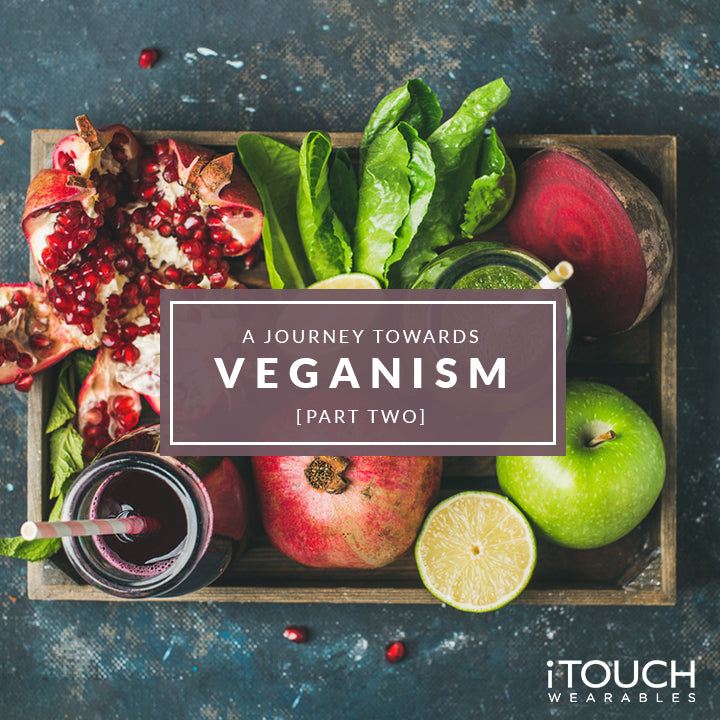
A Journey Towards Veganism - Part Two
Just a little over a month ago, I had written a post about my transition to veganism, talking about my experiences and reasons behind the move. While I had not fully transitioned into veganism at that time, I can proudly say that I have officially been vegan since issuing that post! *Pause for applause* (Thank you, thank you!) It has been an interesting transition, one that I can truly say had it's mistakes (did you know that some Tropicana Orange Juices aren't vegan - don't believe me, check the Heart Heathy - Omega3 bottle). There were recipes that went haywire, ingredients that turned out to be disastrous, but overall, I can officially say that it was extremely worth it!
In dating my partner who has been vegan for his entire life, he was certainly impressed on how far I have come with my transition. My weekly trips to Taco Bell or Burger King have become weekly meal prep sessions, diving into my blender and whipping away recipes like vegan ricotta cheese, meatless burgers, and coconut coffee ice-cream (skip down below for the recipes) instead of heading deep down into a crunch-wrap supreme. We are amazed with what ingredients and foods I have become a fan of, never really knowing that I would be a fan of coconut oil, oat milk, nutritional yeast, avocado, chickpeas, mushrooms, or even jackfruit! But the more and more I dive into getting creative with recipes and my meals, the more and more I enjoy it - my boyfriend guaranteed!
Having the time to cook and having someone who actually can enjoy the meals I make are two really small things that have made a huge impact in the transitioning to veganism! Once again, I am understanding in knowing that this may not be the case for some people, but I continue in being an advocate when it comes to starting the transition - even more so, I have extended my little guide to help once again ensure your journey towards veganism can go smoothly like mine.
The Health Benefits of Going Vegan

In wanting to go vegan, I was turned on by the numerous amounts of health benefits that come with the diet transition. While many people are familiar with the weigh loss benefits, the are actually many other incredible benefits in being vegan! Here are some of the most interesting ones:
- A Vegan Diet Is Richer In Many Nutrients - When switching to a vegan diet, you are obviously getting rid of your reliance on meat and other animal products that contain nutrients your body needs. However, you will begin to find other sources to heavily rely on, which in many cases, becomes foods like whole-grains, beans, legumes, nuts, fruits, vegetables, and more! When it comes to eating these foods in the mast quantities that many vegans do, they are generally said to have a higher daily intake of many nutrients than compared to their meat-eating counterparts. There are several studies that have shown that vegan diets are higher in fiber, antioxidants, and vitamins such as Vitamin A, C, and E.
- A Vegan Diet Can Help Lower Blood Sugar and Improve Kidney Health - It was found in many sources that vegans tend to have lower blood sugar levels, higher insulin sensitivity, and up to a 50%-78% lower risk of developing type 2 diabetes. In one study, 43% of participants following vegan diets were able to reduce their dosage of diabetic medication than those who had followed a diet from the American Diabetes Association, American Heart Association, and the National Cholesterol Education Program.
- A Vegan Diet May Protect Against Certain Cancers - Vegan diet have been known to lower the risk of almost 1/3 of all cancers. For example, eating legumes regularly have been shown to reduce your risk of colorectal cancer by up to 18%. It was also found that eating about seven portions of fruits and vegetables a day can lower your risk of cancer by up to 15%. Whats more, vegan diets that consist heavily of soy products have been shown to reduce the risk of women developing breast cancer, proven by several studies done by the National Institutes of Health.
If these aren't reasons enough to go vegan, check out these other benefits that come from veganism.
The Environmental Benefits of Veganism

While the health benefits of veganism may be reason enough to transition to the diet, if you care about your environment and want to create a more sustainable lifestyle, veganism may just be another way to do so. The vegan diet can make a huge impact on the environment and our global carbon footprint - here is how:
- Veganism Can Create More Farmlands For Humans - It might be shocking to hear, but more then 70% of the food we grow in the United States isn't actually eaten by humans. In fact, it is actually used to feed the livestock that we produce to create animal-based products. Globally, 83% of all livestock is actually used for raising animals. More so, it is estimated that over 700 million tons of food that can go to heading humans actually goes to feeding these animals. All the deforestation, overfishing, and pollution that go into the meat and fish industry is completely not worth the environmental waste. If we also used more of the farmland used to feeding these animals for humans, we can also be able to feed more people at less than the expense that plants usually have.
- Veganism Can Help Conserve Water - Livestock guzzle more water more than anything else and are also the biggest polluters of our fresh water yet. The more livestock that replaces plants, the more water can essentially be depleted. It takes 100 to 200 times more water to create one pound of beef than it does a plant, so consider replacing roasted beef or chicken with roasted vegetables instead!
- A Vegan Diet Can Clean The Soil - Livestock erode and weaken soil, partly due to the large amounts of deforestation that is caused from raising livestock. Raising a diverse amount of plants can instead help to nourish the soil and lead to long-term resilience.
- Veganism Reduces Our Energy Consumption - Raising livestock costs a lot of energy and creates a huge impact on our global footprint. This is due to the long variety of issues that go into raising livestock - the long time it takes to grow the animals, the food they need to consume, and then the finishing product of which it needs to be shipped and refrigerator.
My Favorite Vegan Recipes
For Breakfast
Maple French Toast

Warm, gooey, and full of goodness, this vegan french toast will surely please and be a showstopper for your morning! Perfectly matched with your favorite cup of coffee, it will turn into your favorite breakfast ever!
Serves - 4 | From "It Doesn't Taste Like Chicken"
Gather Together :
- 1 Large Banana
- 3/4 Cup of Full-Fat Coconut Milk
- 1 Tablespoon of Maple Syrup
- 1 Teaspoon of Vanilla Extract
- 1/2 Teaspoon of Cinnamon
- 1 Tablespoon of Vegan Butter - Plus More In Needed For Frying
- 4 - 6 Slices Day-Old Bread
Directions :
- In a blender or food processor add the banana, coconut milk, maple syrup, vanilla extract, and cinnamon. Blend to a smoothie-like consistency. Pour the mixture into a shallow wide bowl that will fit a slice of bread.
- Heat the vegan butter in a non-stick frying pan over medium heat. The sugars in the fruit make the mixture very sticky, so be sure to use a high-quality non-stick pan.
- When the pan is hot and the butter is melted, dip a slice of bread into the batter and coat both sides. Place the bread in a hot pan and fry for a couple of minutes per side until golden brown.
- Serve hot with maple syrup, vegan butter, fruit, or any toppings of choice.
For Dinner
Roasted Chickpea Tacos with Roasted Corn Salsa

You'll never want to eat tacos made from meat ever again! The roasted chickpeas are deliciously crispy and perfectly seasoned, while the roasted corn salsa adds a little bit of bite and zest to the dish to bring it all together. Add your favorite toppings to truly make these tacos delicious!
Serves 3 | Recipe By Patrick Zavorskas
Gather Together:
- For Roasted Chickpeas:
- 2 14 Ounce Cans of Garbanzo Beans or Chickpeas - Drained, Rinsed, and Patted Dry
- 1 Packet of Taco Seasoning - Such as Ortega
- Olive Oil - For Drizzling
- For Roasted Corn Salsa:
- 3 Cups of Corn - Either Frozen or Fresh
- 1 Cup of Red Onion - Finely Chopped
- 1/2 Cup of Fresh Cilantro - Chopped
- 1 to 2 Medium Jalapeño Peppers - Chopped
- 1/4 Cup of Lime Juice - From About 2 Limes
- 1 Tablespoon of White Wine Vinegar
- 1/4 Teaspoon of Chili Powder
- 1/4 Teaspoon of Cumin
- Salt and Pepper - To Taste
- For Tacos:
- Roasted Beans
- Roasted Corn Salsa
- Taco Shells - (I Used Pita Bread Pockets)
- Green Cabbage - Finely Shredded Or Chopped In A Chiffonade
- Avocado or Guacamole - To Taste
- Hot Sauce - To Taste
Directions:
- Pre-heat oven to 400 Degrees Fahrenheit. Toss the chickpeas, olive oil and taco seasoning together on a large sheet-pan and bake until crispy, about 30 minutes, flipping a few times.
- Meanwhile, make the salsa - roast the corn along with the chickpeas, cooking for about 15 minutes until lightly browned. While the corn is roasting, chopped onions and jalapeños, adding to a bowl along with the cilantro, lime juice, white wine vinegar, spices, and salt and pepper to taste. When corn is finishing roasting, add along to the bowl and stir everything to combine. Let the salsa marinate for about 20 minutes while finishing prepping for the tacos and adjust to taste preferences.
- Heat the taco shells or pita on the stove, allowing to brown for a few seconds over high heat until slightly crisp.
- When the chickpeas are done, begin to assemble tacos. Start with the chickpeas, then the salsa, finishing with the cabbage. Garnish with avocado, guacamole, and hot sauce if desired.
For Desset
Coconut Coffee Ice Cream - No Churn

Let me tell you a little something about this ice cream - if you are a major coffee fan like I am and enjoy sweets, this is the perfect thing for you! It is naturally sweetened with maple syrup which brings out flavors in the coffee even more! It is super easy to make and you do not have to worry about having an ice cream maker!
Serves - 12 | Recipe Adapted From Minimalist Baker |
Gather Together :
- 2 14-Ounce Cans of Coconut Cream OR Full-Fat Coconut Milk - Chilled Overnight (Make Sure Your Coconut Cream Does Not Contain Guar Gum, It Will Not Work)
- 1/2 Cup of Pure Maple Syrup
- 1 Teaspoon of Vanilla Extract
- 1 Cinnamon Stick - Broken Into Pieces
- 1/2 Cup of Non-Dairy Milk - Such As Unsweetened Original Almond Milk
- 1/2 Cup of Coffee Beans - Lightly Crushed | Coarsely Ground (I Used Rook Coffee's Nicaragua Medium Roast Coffee)
Directions :
-
Place a large mixing bowl in the freezer to chill.
- Meanwhile, heat the almond milk, coffee, and cinnamon in a pot over medium heat. Heat until barely boiling. Once steaming, remove from heat and steep for no less than an hour.
-
Without tipping the cans, scoop out the coconut cream from the cans of coconut cream OR coconut milk, reserving the clear liquid for other uses. Place in chilled mixing bowl.
-
Using a mixer, whip until creamy and smooth. Then add maple syrup, vanilla, and steeped coffee-almond milk mixture. Whip until fully incorporated.
-
Taste and adjust flavors as needed. You might find you want it a little sweeter, which you can add more sugar if needed.
-
Transfer to a parchment-lined freezer-safe container and cover loosely with plastic wrap, then foil to help freeze.
-
You can take this out in a couple of hours for a chilled mousse-like ice cream. Freeze overnight for a firmer ice cream.
-
Set out for at least 20 minutes prior to scooping, and use a scoop warmed under hot water for a proper scoop.
-
Will keep in the freezer for up to one week, but best when fresh.
Notes:
- What To Do If Your Coconut Cream Doesn't Whip - Do not be alarmed if your coconut cream doesn't whip. There are some ways around it to ensure you can still make the ice cream. For starters, try adding in some powdered sugar or cornstarch, just a couple teaspoons at a time. This might help to set the cream and create stiffer peaks. If this doesn't work, try freezing the cream. Place the coconut cream into the chilled bowl, and freeze for 30 minutes. Then whip it with a blender to smooth. Continue until the mixture completely resembles that of whipped cream, which for me, took about 2 hours to do. You can continue to the next steps once reached.
Vegan Essentials
Cashew Ricotta

Cashew Ricotta is super easy to make and definitely an essential for an vegan who used to be a cheese lover! It is super creamy and can be used in any recipes where ricotta is needed.
Serves - 8 (2 Cups) | From The Simple Veganista
Gather Together :
- 1 1/2 Cups of Raw Cashews - Soaked In Water For At Least 2 Hours
- 1/2 Cup of Water
- The Juice of 1 Large Lemon
- 1 – 2 Tablespoons of Nutritional Yeast
- 1 Small Garlic Clove
- 1/2 Teaspoon of Onion Powder
- Sea Salt and Pepper - To Taste
Directions :
- Drain cashews and place all remaining ingredients into a blender or food processor, process until creamy stopping to scrape down the sides every few minutes. Taste for flavors adding any additional ingredients. Some like a salty ricotta so feel free to add as much salt as you want.
- Store in an airtight container in the refrigerator for an hour or two, this will stiffen the mixture a bit. You can also prepare your dish straight away without refrigeration if needed. Refrigeration will thicken the mixture a bit. If it becomes too thick, add a tad of water and mix well.
- Store in refrigerator for up to a week, or store in the freezer for up to 2 months in a freezer safe container.
Vegan Salad Dressings With No Oils

These extremely easy to make dressing are a go-to for any vegan looking to replace their old favorite dressings with plant-based options! No need for anchovies, eggs, or heavy fattening mayonnaise, these dressings are made from healthy fats and fresh herbs to surely please!
CREAMY CASHEW HERB DRESSING
Gather Together :
- 1 Cup of Soaked Cashews
- 1/4 Cup of Fresh Dill - Loosely Packed
- 1/4 Cup of Fresh Chives - Loosely Packed
- 1/4 Cup of Fresh Parsley - Loosely Packed
- 3 Cloves of Garlic - Chopped
- 1/2 of A Lemon - Juiced
- Salt And Pepper - To Taste
Directions :
-
Drain cashews. Add cashews, dill, chives, parsley, garlic, lemon juice, salt & pepper to a high speed blender. Blend on high until combined and smooth - adding water if needed. Taste and adjust seasoning as needed.
CREAMY AVOCADO HERB DRESSING
Gather Together :
- 1 Avocado - Peeled and Pitted
- 5 Large Basil Leaves
- 1/4 Cup of Cilantro Leaves - Loosely Packed
- 1/4 Cup of Chives - Loosely Packed
- 1/2 of a Lemon - Juiced
- 1/4 Red Onion - Roughly Chopped
- 2 Green Onions - Roughly Chopped
- 1 Clove of Garlic - Roughly Chopped
- Salt And Pepper- To Taste
Directions :
Add all ingredients to a food processor. Blend on high until smooth. Taste and adjust seasoning as needed.
If you are considering going vegan, hopefully these reasons and recipes can certainly convince you! Share with us how you will transition in going vegan by following us on Instagram @itouchwearables and Facebook @itouchwearables and by dropping a comment and like. Also, be sure to check out our new articles published daily!
-Patrick

